Thursday, June 27, 2013

Time to Paint

Here is our dragon all primed out.  I like to use black gesso to prime my dragons so I can allow some of the black to show through the paint job.  When I black wash him at the end, the black primer that shows through will accentuate the final look of a beat up old dragon.

Tuesday, June 25, 2013

How to skin a Dragon


  So here we are so far after quite a few hours of work.  Old cut up bed sheets soaked in glue and applied to the body and wings, and our dragon is starting to take shape.  Super Sculpty was used to make the eyeballs.  One dragon head is wrapped.. Tomorrow I will post the dragon complete with cloth mache wrap.  (this part can really get tedious)

  Things are going to speed up a bit now, as I have just found out I am bound for the mainland next week, and this guy needs to be done......he's got a party to go to.

Saturday, June 22, 2013

Earning my Wings

Got my dragon wing frame work fabricated and taped on my dragon.  Now its time to take him down to the lab for some cloth mache wings.  They are drying now....stay tuned for a preview tomorrow!

Slowly we turn

As you can see from above, I have started the cloth mache on the feet and the bottom areas of the dragon..  As I turn this critter around to work on him, I notice that he could use some more musculature in his other forearm, which I have taped on, and he needs more bulk in the opposite side of his torso, which I have also taped on.  This is one of the reasons I always put a layer of papier mache on all the adjustments I make, instead of going directly to the cloth mache........ it gives me time to assess the anatomy of my beast and make corrections I don't spot right off the bat.  I think we are ready for some wings!

Tuesday, June 18, 2013

No one can stop THE CLAW!

  How'd I do those claws??  Step 1:  Chop the top off the foot!
Step 2:  Set the claws in the hole just like you like'em.
Step 3: Tape the claws in place, then tape the piece you cut off over the top of the claws and then tape everything up real tight!

These claws ride slightly above ground level so as not to catch on anything in case someone  slides your creature around.  (Don't lie....you've seen people....friends, neighbors, maybe even your wife or kid do this!!)


Now we are getting somewhere.
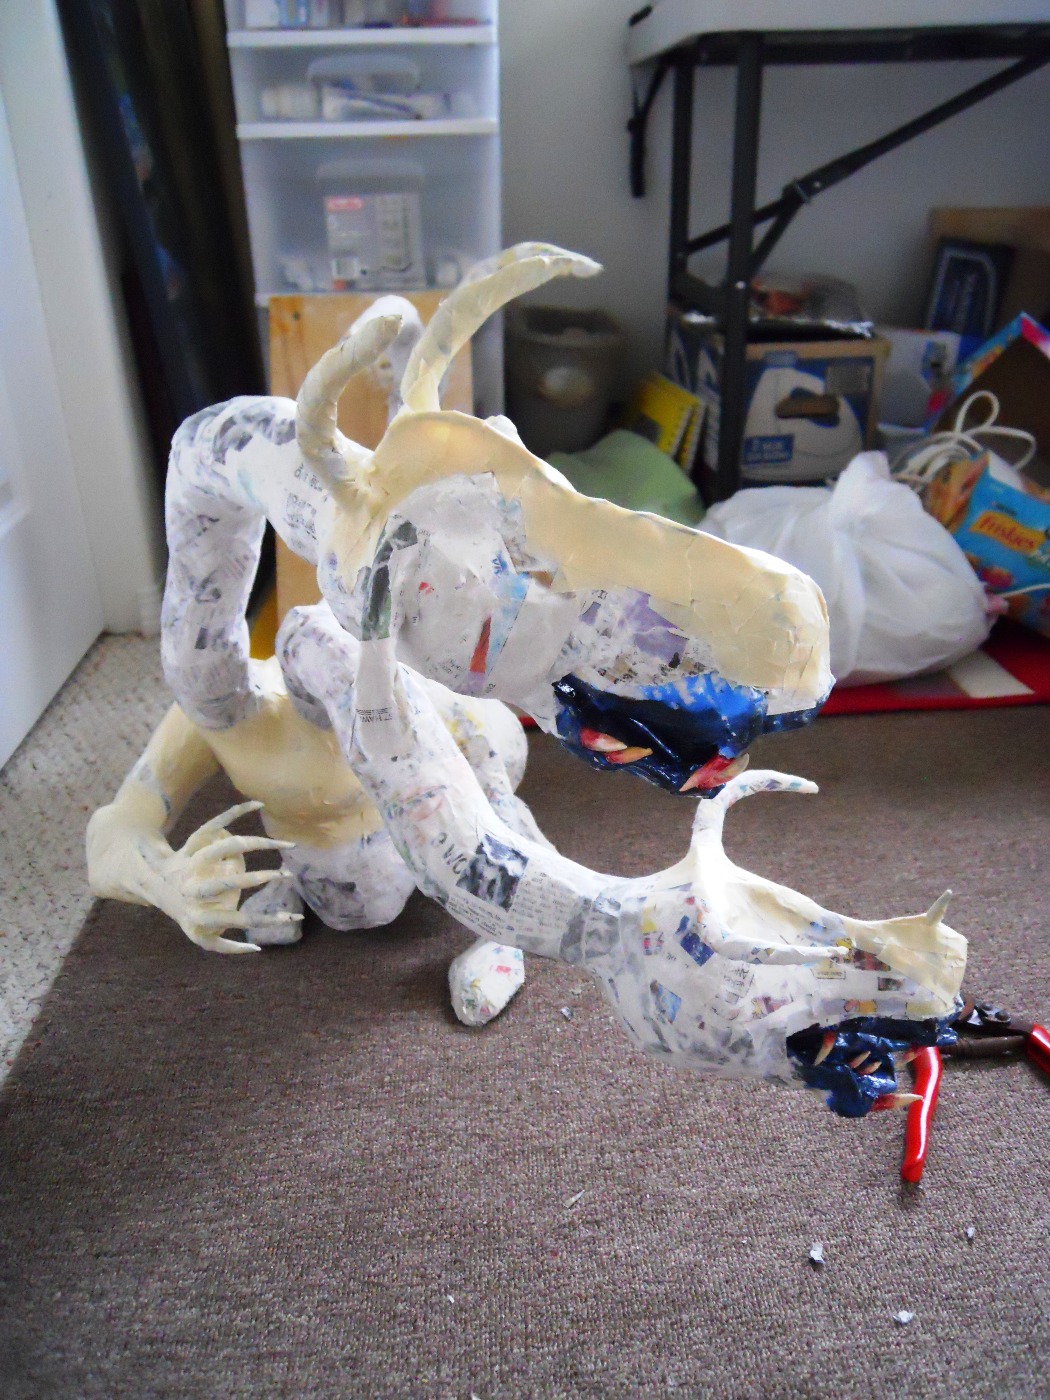
  After a nice "no work" weekend, our dragon is back under way.  The upper head has a new ridge line on his head and snout, along with some horns.  The lower head got a small snout horn.  I have added the claws to the raised foot, and outfitted the arm with some tendons and muscle bulges.  Also beefed up his chest just a little.  I hope to mimic the claws on the other 3 feet, in a way that makes them appear retracted, like a cats.  Just hinting at them via ridges in the tops of the feet.  After that, some eyes and nostrils and this creature will be ready for the cloth mache ala Dan the Monsterman!

Tuesday, June 11, 2013

Heads will Roll

Isn't this cool!!  Got the jaws set in the heads and the heads attached to the necks.  I had to break and re bend the lower neck to get the head pointing the way I wanted.  I have started to tape on a little detail on the upper head with pieces of scrap papier mache, and newspaper pieces shaped and taped, then applied to the head.  Once the lower head has his nose ridge and eye brows, I'll give the taped area an application of papier mache to unify it all into one solid piece.  Then I'll add the eyes, nostrils and maybe horns or ears depending on what "seems right".
  *PS... this dragon is being built with techniques gleaned from Dan Reeder and his Paper Mache Monster book.  It was his book that opened the door to paper mache sculpture for me.  Check him out at...  www.gourmetpapermache.com