
Showing posts with label artist. Show all posts
Showing posts with label artist. Show all posts
Thursday, August 1, 2013
This little piggie was too little


Saturday, July 6, 2013
Mortimer LIVES

Couple of Dragon tips. Break the tips off a few of the teeth....after all they are always crunching up the peasants property and livestock and fighting other dragons and monsters too! Painting a Dragon with 2 different colored eyes (see upper head) gives them a magical look too.
Thursday, June 27, 2013
Time to Paint

Tuesday, June 25, 2013
How to skin a Dragon

So here we are so far after quite a few hours of work. Old cut up bed sheets soaked in glue and applied to the body and wings, and our dragon is starting to take shape. Super Sculpty was used to make the eyeballs. One dragon head is wrapped.. Tomorrow I will post the dragon complete with cloth mache wrap. (this part can really get tedious)
Things are going to speed up a bit now, as I have just found out I am bound for the mainland next week, and this guy needs to be done......he's got a party to go to.
Tuesday, June 18, 2013
No one can stop THE CLAW!


These claws ride slightly above ground level so as not to catch on anything in case someone slides your creature around. (Don't lie....you've seen people....friends, neighbors, maybe even your wife or kid do this!!)
Now we are getting somewhere.
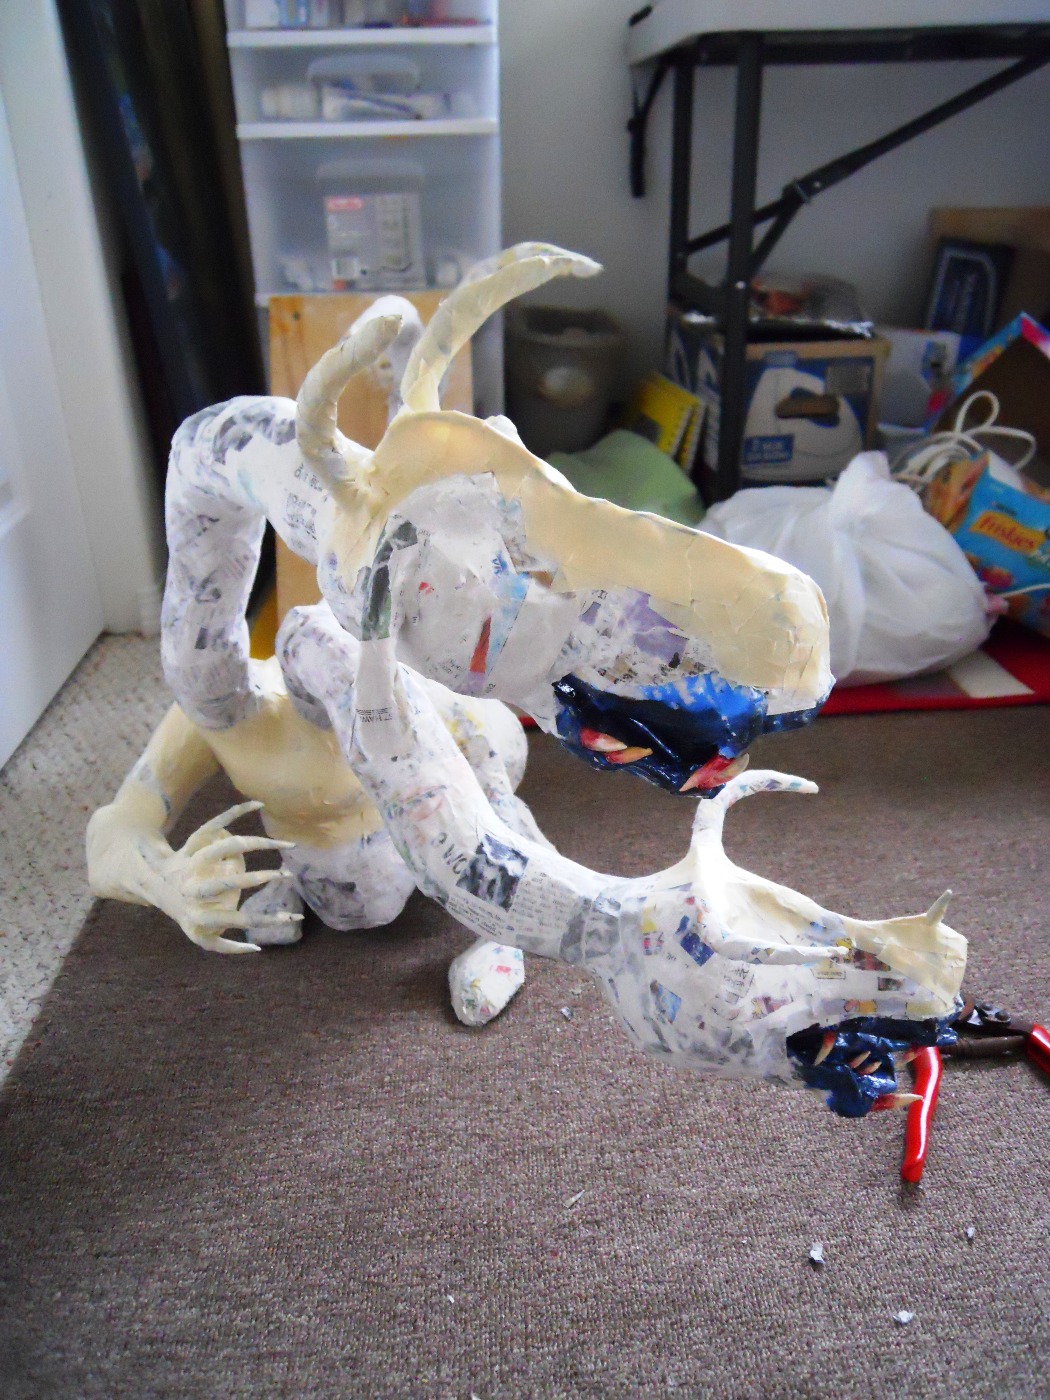
Tuesday, June 11, 2013
Heads will Roll

*PS... this dragon is being built with techniques gleaned from Dan Reeder and his Paper Mache Monster book. It was his book that opened the door to paper mache sculpture for me. Check him out at... www.gourmetpapermache.com
Monday, June 10, 2013
JAWS

I am hoping the papier mache goddess (aka my wife) brings me home a nice bag of flour today, as I am out. Target's brand of flour is my personal fav. Anyways, then we can add some heads, and ears....maybe horns, or spikes.... depends on how his heads shape up. A pretty big project, huh?
Friday, June 7, 2013
Legs and heads

Thursday, January 13, 2011
I thought I saw a.......painting

Its funny how you have one thing in mind when you start a canvas and something else shows up when you are done. I wanted to paint a pretty golden haired girl, just to paint something pretty. In my mind I saw it as a stained glass look, and this is what I finished up with. "Sister Golden Hair" 18 x 24.
So the question is.........was I not good enough to paint the image I saw in my head, or is this what I was really supposed to paint?? After all........I did it!
Later
Wednesday, January 12, 2011
 Originally the rear vase in this piece was black, but it created such a strong sillouete that there was not enough distiction between the 2 vases. Letting some light through a green glass vase slides it far enough into the background so the piece picks up dimensionality.
So here is "Blue Vase II" 9" x 12" acrylic on board. I like the sparkle.
Later
Monday, January 10, 2011
What is this Show, and why must it go on?
 Somehow the circus seems to be something I can relate life in general to. Living, dying, joy and sadness all abound under every big top. We all know it.......that's why everyone goes.
This piece is called "Walking the Tight Rope" 16 x 20. Its a little slice of everyone's life......... Someone trying to perform an incredible task, under the blazing scrutiny of the public eye while life sets unpredictable road blocks ahead of him.
And I ask myself this.........Why do some people take to walking the tight rope while the rest of us sit in the audience and watch?
Later
Wednesday, January 5, 2011
It ain't easy being Green

Lots of time I lament about the disadvantages of acrylics......frozen texture, wimpy bodied.....etc, etc. Well here is how acrylics shine. I started this little flower as pink with a green background. No matter how hard I tried, I could not make that green work. So after a day....I went right over the top of it with this cad red, the cad orange combo. My little flower gave a sigh of relief to see the last of that green, and so did I.
Now this says just what I want it to...flower, color, and texture...........to where you want to reach out and touch it. So here's "Pink Daisey" 7 x 12.
Later
Saturday, January 1, 2011
Delivery Day
 Just dropped off these 7 pieces to The Gallery at the Hilton Waikoloa today. Nice to see them leave the studio and get out into the public eye. I always pick a favorite, or try to figure out which one will sell first.........I'm always wrong. Mostly because people are buying decor.......not art. But you know what. The money spends just the same.
My fav is "Watermelon" (upper left), and I think "Are you going to Finish That? (cats under watermelon) will sell first.
Wednesday, December 29, 2010
A different perspective

I have always liked the way Expressionists can aesthetically distort spaces to make them add to a piece. I was looking to achieve that here in this piece called "Working Without a Net" 16 x 20. I also wanted to engage the viewer in the question.......Will she make it? Its a long way down...........all symbolic of the way I am painting lately......no net, just start attacking the canvas with an idea. I know its a long way down, but does anyone get this?? Or am I just tilting at windmills?
Later............
Sunday, December 19, 2010
Who painted that?

This is the 1st piece I started after my long work hiatus. I always start with blue when I'm struggling to get things moving. I was shooting for a evening back-lit floral............weird huh, because people like florals for the color. This one almost makes the jump, but kinda got stuck in low gear.
As one of my favorite painters once said...."If the work doesn't excite you, don't expect it to excite your audience". I do feel it was a good starting point and an exercise in building up texture, and it led to the cat painting posted previously, which is as spontaneous and fresh, as this one is not.
I am starting to reach a limiting factor, texture wise with my acrylics. They are too soft to build up in one pass and they dry down so fast that you cannot rework into them, only on top. Its also very hard to make changes in your design mid-stream, as the initial design is always frozen in place underneath. If I did not live in Hawaii, I would be switching to oil painting right about NOW!
Some much more expressive and intimate pieces are drying here in the studio, that will knock your socks of, so enjoy "Back lit Floral" 11 x 14, and I'll see you.........later!
Friday, December 17, 2010
I dig those crazy cats
 This is a painting of Lloyd and Cooper.......2 feral cats who regularly come to breakfast, lunch, and dinner at our house. Cooper (white cat) is always more than willing to "help" any of the other cats finish their food, hence the title "Are You Going to Finish That?" 16 x 20.
I just started the piece right on the board with no preliminary drawing....just pow! straight away. And on we go.......
Monday, October 25, 2010
Here I am.....again
 Just back from an extended work trip to California. How different it is there compared to Hawaii. As I get acclimated to home again, its time to start thinking about getting the paints out again.
In the meantime....I had the privilege of being included as an artist interview at a really nice website called www.whopple.com
They also provided me with a direct link to my interview page, so please check it out!
www.whopple.com/artist-interview-with-james-c-osterberg-jr.html
That being said.....here is a painting I did when I lived in California, called "DayDream" 30" x 30". It was one of my favorites from that time......hope you like it.
Sunday, September 5, 2010
Checkers anyone?
 It looks like the clown paintings have taken off into a full blown series. I do have an affinity for sad clowns........ a feel for them. They all have little pieces of me in them.
Why can people relate to a "sad" painting more than a "happy" one? I've seen people look at a sad painting and say....."Boy, I know exactly how that feels" or "I can really relate to that". I've never seen anyone look at a happy painting, and say how they remember when they felt happy like that. Why is happy so fleeting and sorrow seems to last forever?
Well any ways, this is "Checkers" 16 x 20, and he just seemed to develop on my panel all by himself, like he was waiting for me.
More clowns on the way, so enjoy the ride!
Thursday, September 2, 2010
What a Pansey!

Thought I might try another clown today, just to see where this is going. Things are slow at The Gallery so I don't feel any production pressure, so another clown was in order.
This is "Pansey" 14 x 18, who appeared on my easel after a few false starts. Again I'm finding that there is always a little something unexpected lurking under the made up face. Actually, its kinda like looking in a mirror when I look at this piece. Odd.
Subscribe to:
Posts (Atom)
